


How to be a Book Designer for a self-published book project
Working with Non-Traditional Publishers: Part 5

Hey! I recorded myself reading this post, so you can listen on-the-go or while you’re drawing!
I’ve been writing a multi-post series all about Working with Non-Traditional Publishers, including clients who are self-publishing their books. These could be individual clients, non-profit organizations, or anyone else who isn’t a traditional publisher.
I’m working on my fifth book in this category, and even though each project has taught me some lessons the hard way, the experiences overall have been really positive, which is why I’m sharing these topics with you!
This is the fifth post in the series. Read the other posts here:
3 Ways I Prepare for Working with Non-Traditional Publishing Clients
Don’t Pick Up Your Pencil Yet: Set Expectations First (I Learned the Hard Way)
How to be a Book Designer for a self-published book project (this post)
Today we’ll begin discussing how to fill the roles of Book Designer, Legal Team, and the other things you’ll need to be.
As freelancers working on self-published books, we take on a lot of roles beyond illustrating the book. Over the next few weeks, we’ll talk about how you actually can do all these things yourself (and remember to charge for them — they take a lot of your take and energy!) Here are the things you’ll need to be:
Book Designer (to create the correct file sizes, add text, get files ready for print, etc…)
Legal Team (to negotiate your rate and get a contract signed)
Project Manager (to keep the book on schedule)
So today let’s focus on the role of Book Designer…
How to be a Book Designer for a self-published book project
A Book Designer is the person who does all of the formatting and layout for files and text. They are amazing people who can elevate storytelling by intentionally arranging text on a page, and I have so much respect for them!
When working on a self published project, you assume this role of Book Designer. Here are some very practical things I do at the beginning of each project to make my role as designer much smoother:
1. Create a storyboard to check the overall page count.
Did you know books need to be printed with pages in multiples of 4? For example… 28, 32, 36 pages etc… Why? Think about folding a single sheet of paper in half. You’ll end up with 4 halves— two on the front and two on the back.
In self publishing, you may be working with a client who is writing a book for the first time, so they may not have thought about how this requirement could affect the book.
That’s why it’s so important to dedicate time at the beginning to lay out the entire book from cover and title page all the way to the back cover. It’s a bit of a puzzle, but it is so crucial to figure this out at the very beginning. Otherwise you may end up with the wrong number of pages, and you’ll have to rearrange everything at the end. If you’re working with a print-on-demand publishing or other publishers such as Blurb, you’ll likely need to use a layout like this:
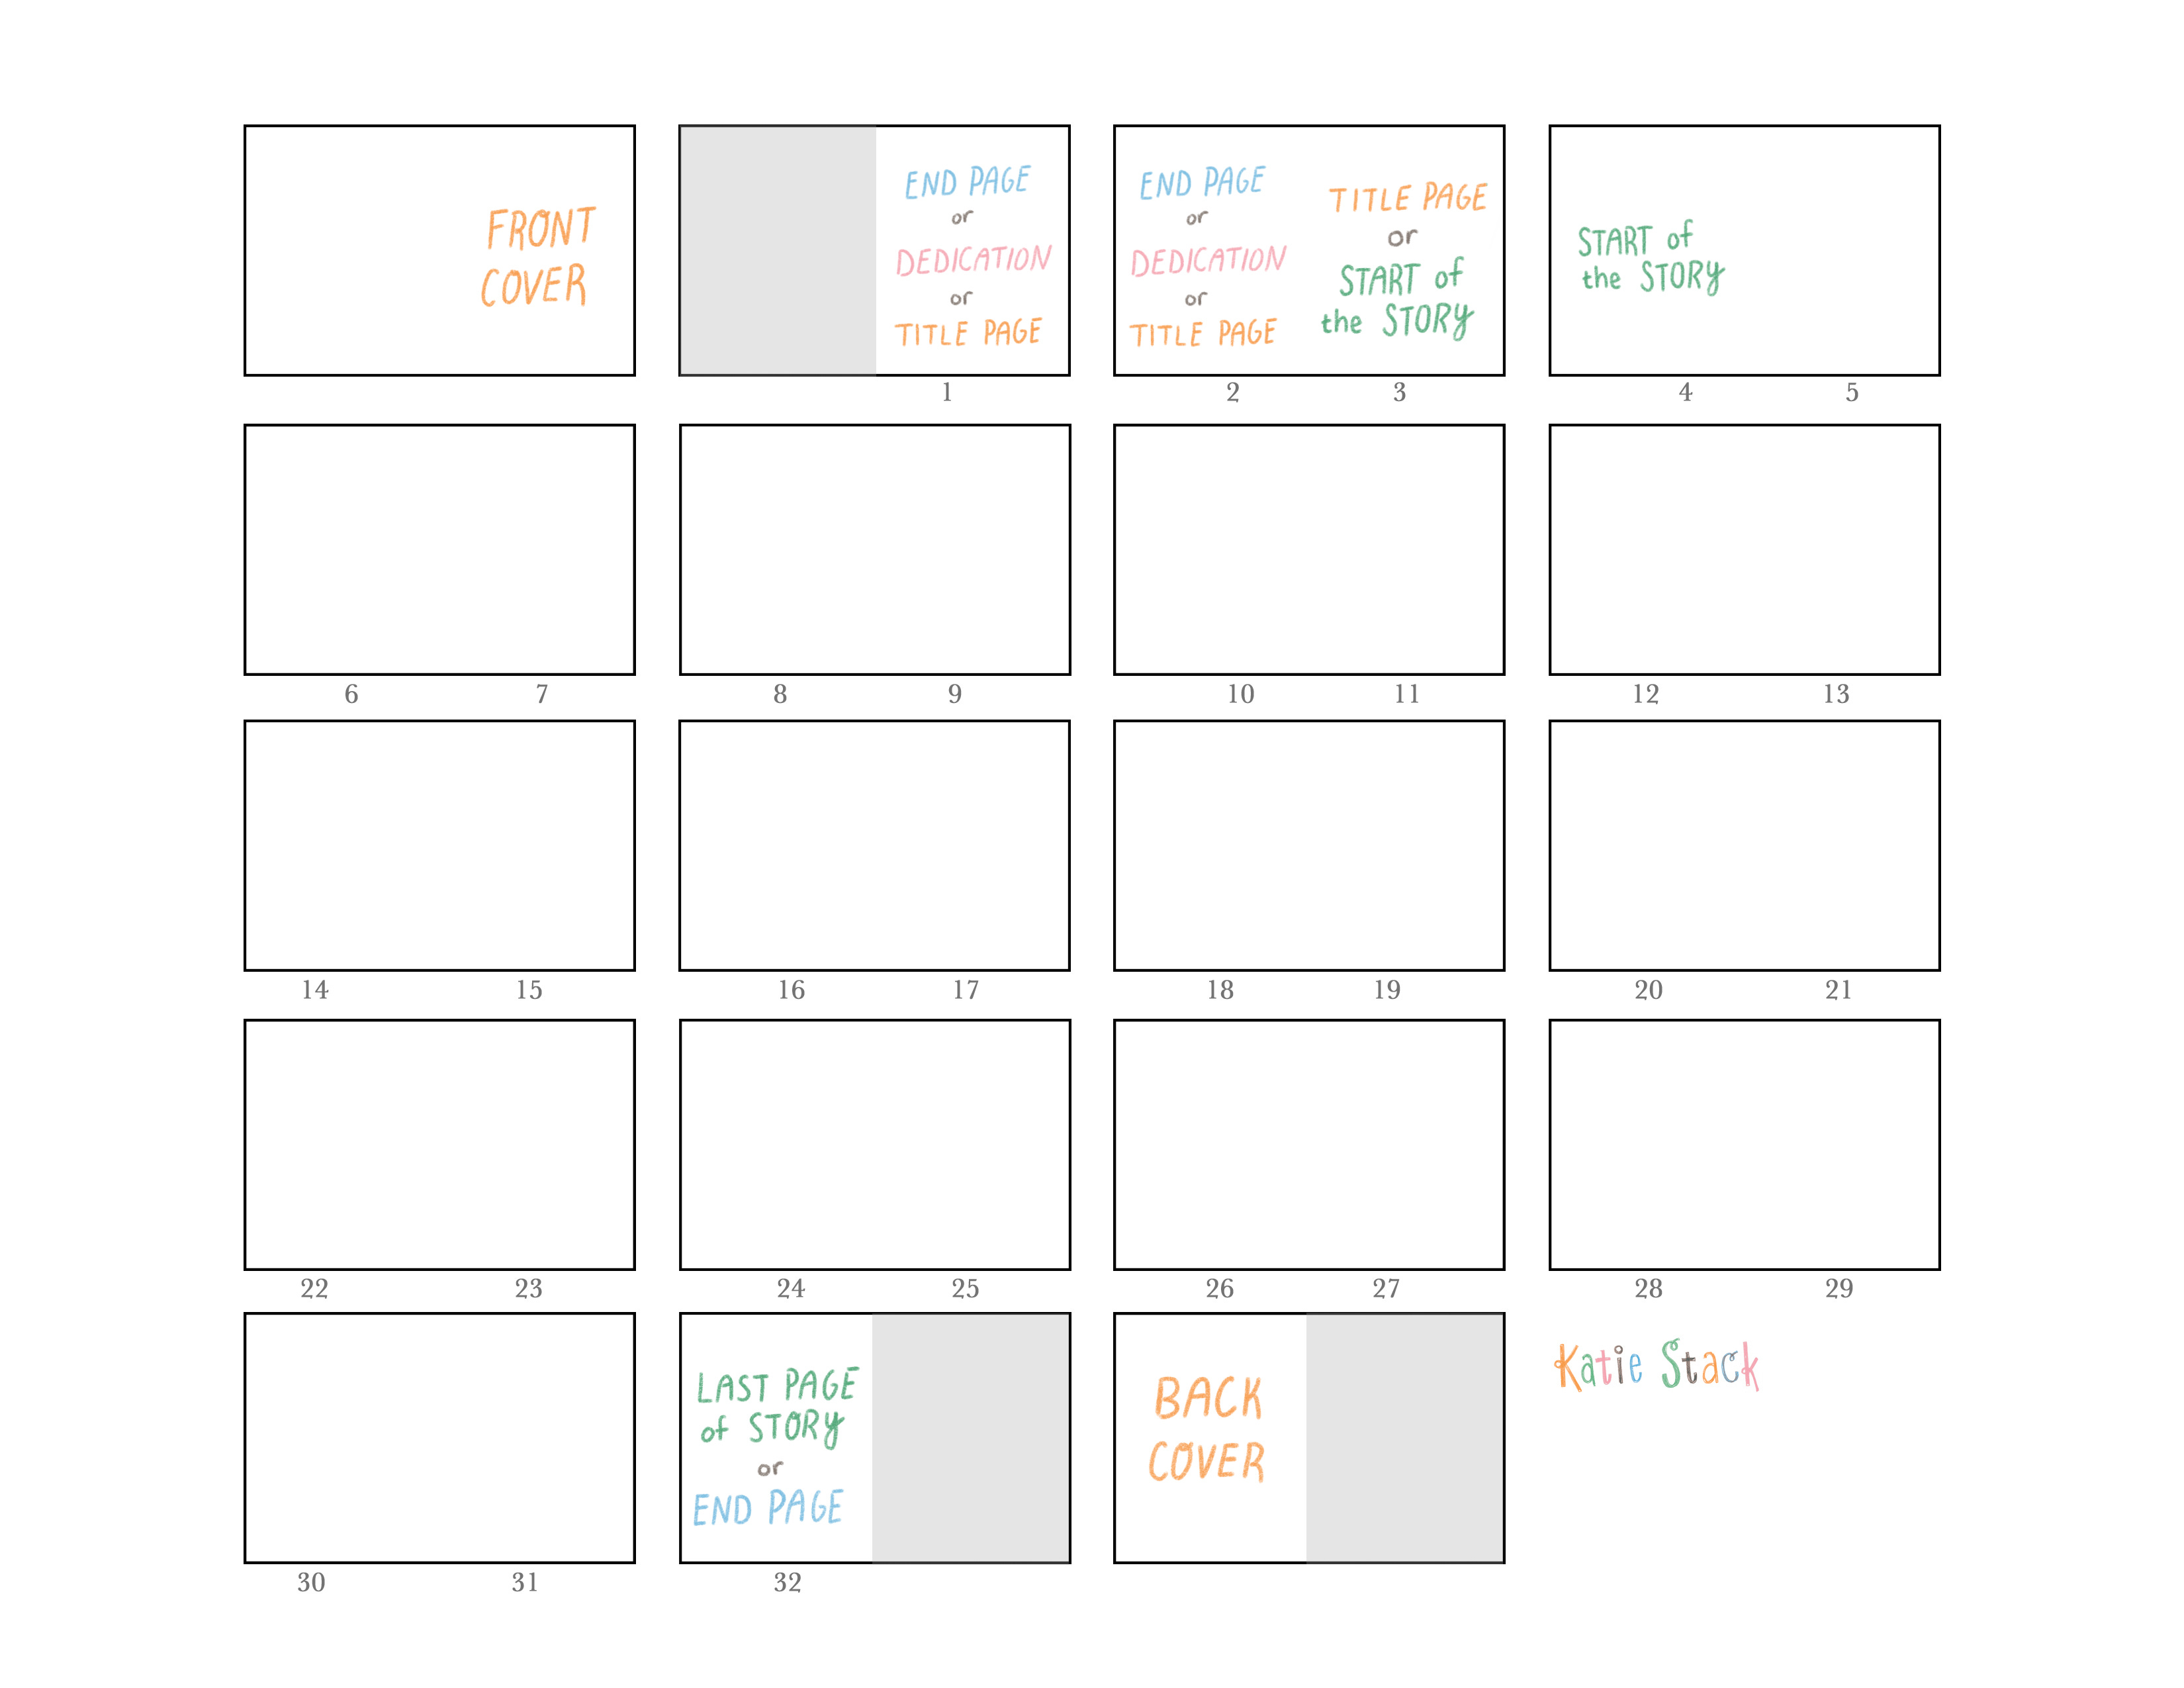
So what do you do when you’ve added all the text from the author, but the pages aren’t a multiple of 4? Here are some tricks for adding and reducing pages: Can you add simple end pages at the beginning and end? Can you add a copyright page? Maybe copyright and the interior title need to share a page? Can you stretch out or consolidate part of the story by rearranging the text for various pages?
There are so many things you can do so take some time, play around with it but make sure this part of the process is set before you move on.
2. Agree on the book size and make sure the printer can print that size
Please don’t save this until the end! It might not seem like a big deal to go from a book sized at 8in x 10in to 8.5in x 11i, but trust me, it really is a huge deal. They aren’t the same aspect ratio, so you couldn’t even just drag each page larger. Instead you’ll have to rearrange the entire page, including your composition that you already beautifully designed.
After you’ve decided on a size, make sure you double check that your printer can print that size. I know some printers who do only printer certain sizes, and it would be the most tedious set of tasks to resize an entire book.
I even recommend putting the book size and printer in your contract. That way, if these details change later, you have grounds to ask for additional payment since the project now requires extra work to align with the new requirements.
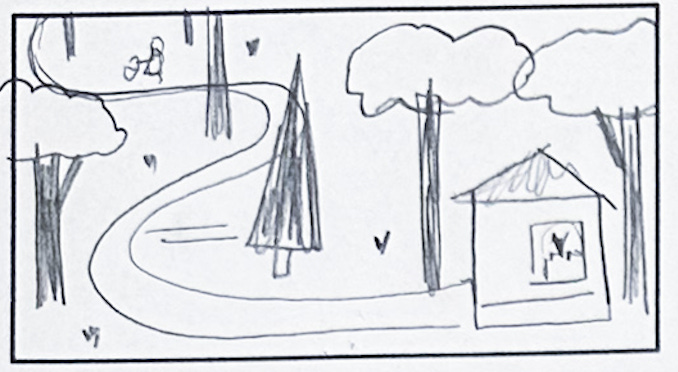
3. Plan your thumbnails with text.
We’re illustrators, so sometimes we forget that picture books have words too :) So when thumbnailing each spread, draw a few lines to indicate where the text will go. That will make it a lot easier to reserve space for the text when you’re moving on to rough art and final art. Here’s an example:
4. Set up a template document with the correct dimensions and guidelines for gutter, bleed, and safe text boundaries.
This will save you a ton of time later! Each time I start a new spread, I create a copy of this template, add the text, and start drawing. Here’s what that document looks like for the book I’m doing with American Kennel Club:
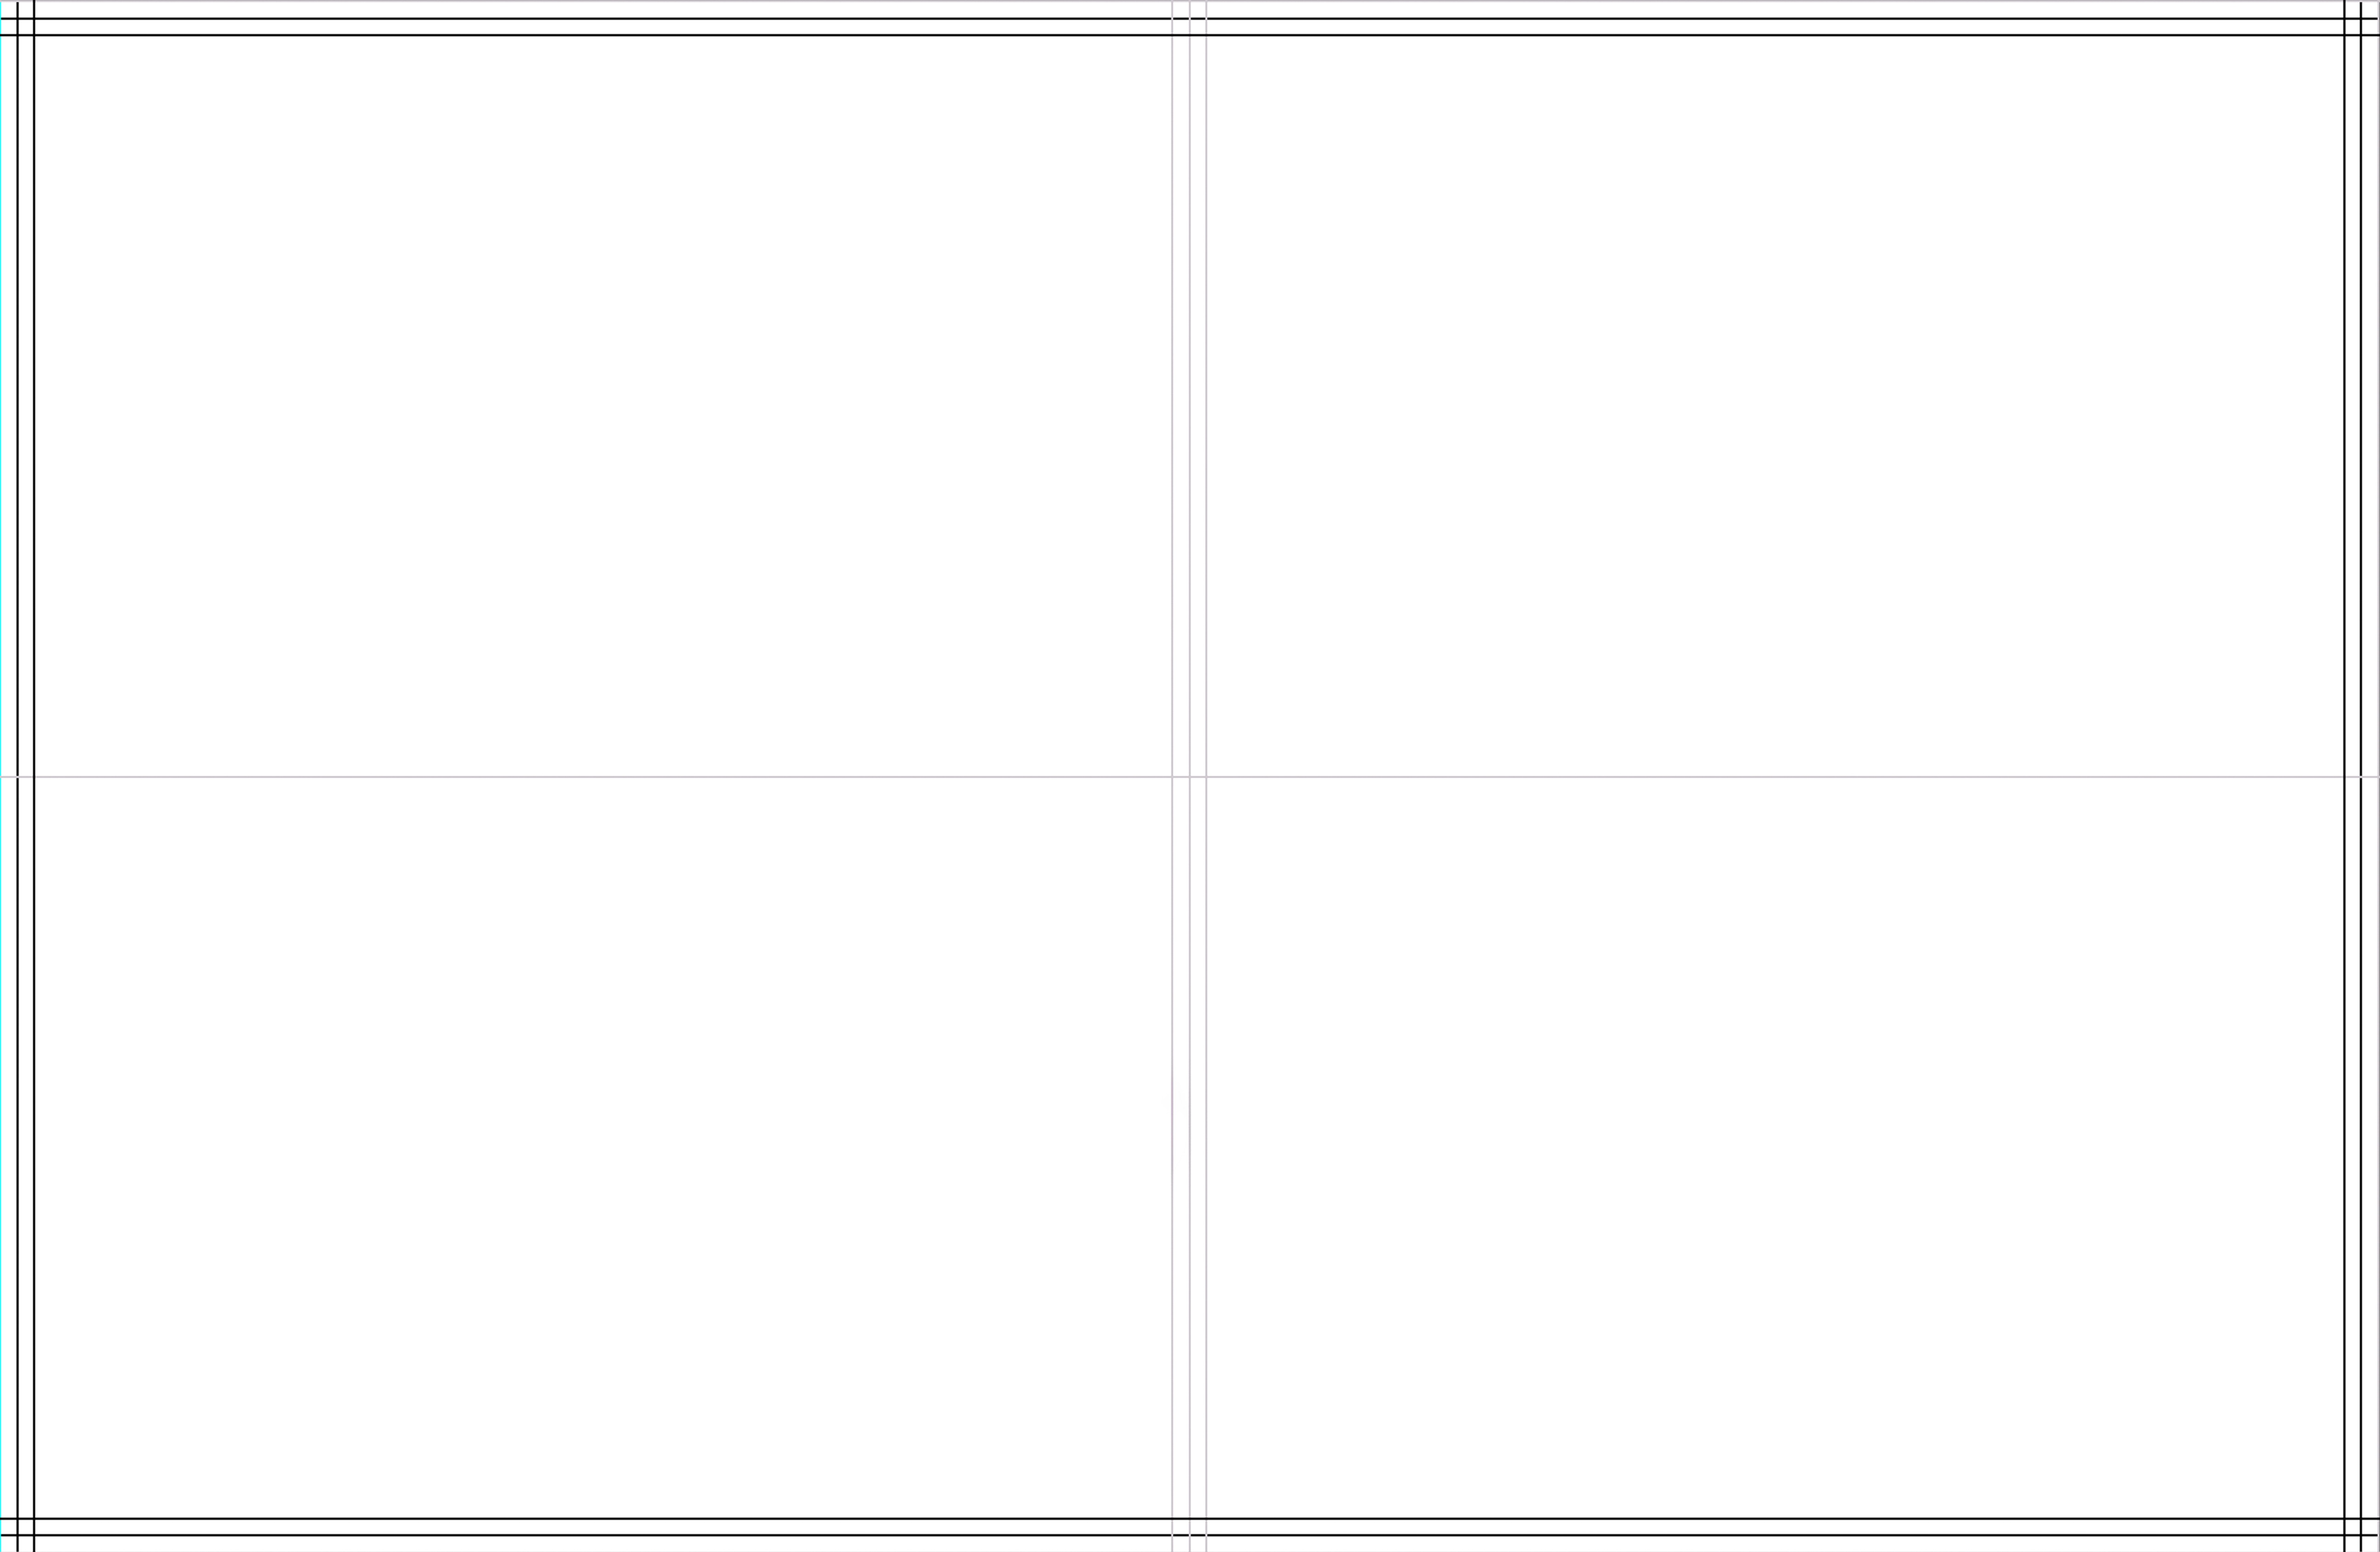
In case you’re unfamiliar with these words, here are some definitions:
Gutter is the space in the center of the book where the book folds. Text should be placed at a safe distance from this area so it is not cut off or squished.
Bleed is the area around the edges of the page that will ulatimately be cut off. Generally there is a bleed of 0.125 inches on all sides, so add this extra bit to your document.
Safe text boundaries will help you place text away from the gutter and away from the edges of the book. In this example, I marked the closest distance from the edge that won’t be cut off, but honestly I never put text that close. I think it looks too close to the edge if it’s placed directly next to the safe text boundary.
If all of this sounds like a lot, you can always consider hiring a book designer!
I haven’t hired a designer, so I can’t speak from experience about that. However I have been hired as a designer. The client provided me with specifications, the text, and the illustrations. I formatted everything and delivered print-ready files for KDP.
So I imagine hiring a designer would be similar, but I think it would be even better to hire a designer to work with throughout the process. In picture books, the interaction between text and illustrations can elevate storytelling, so it would be better to collaborate throughout the book rather than just as the end.
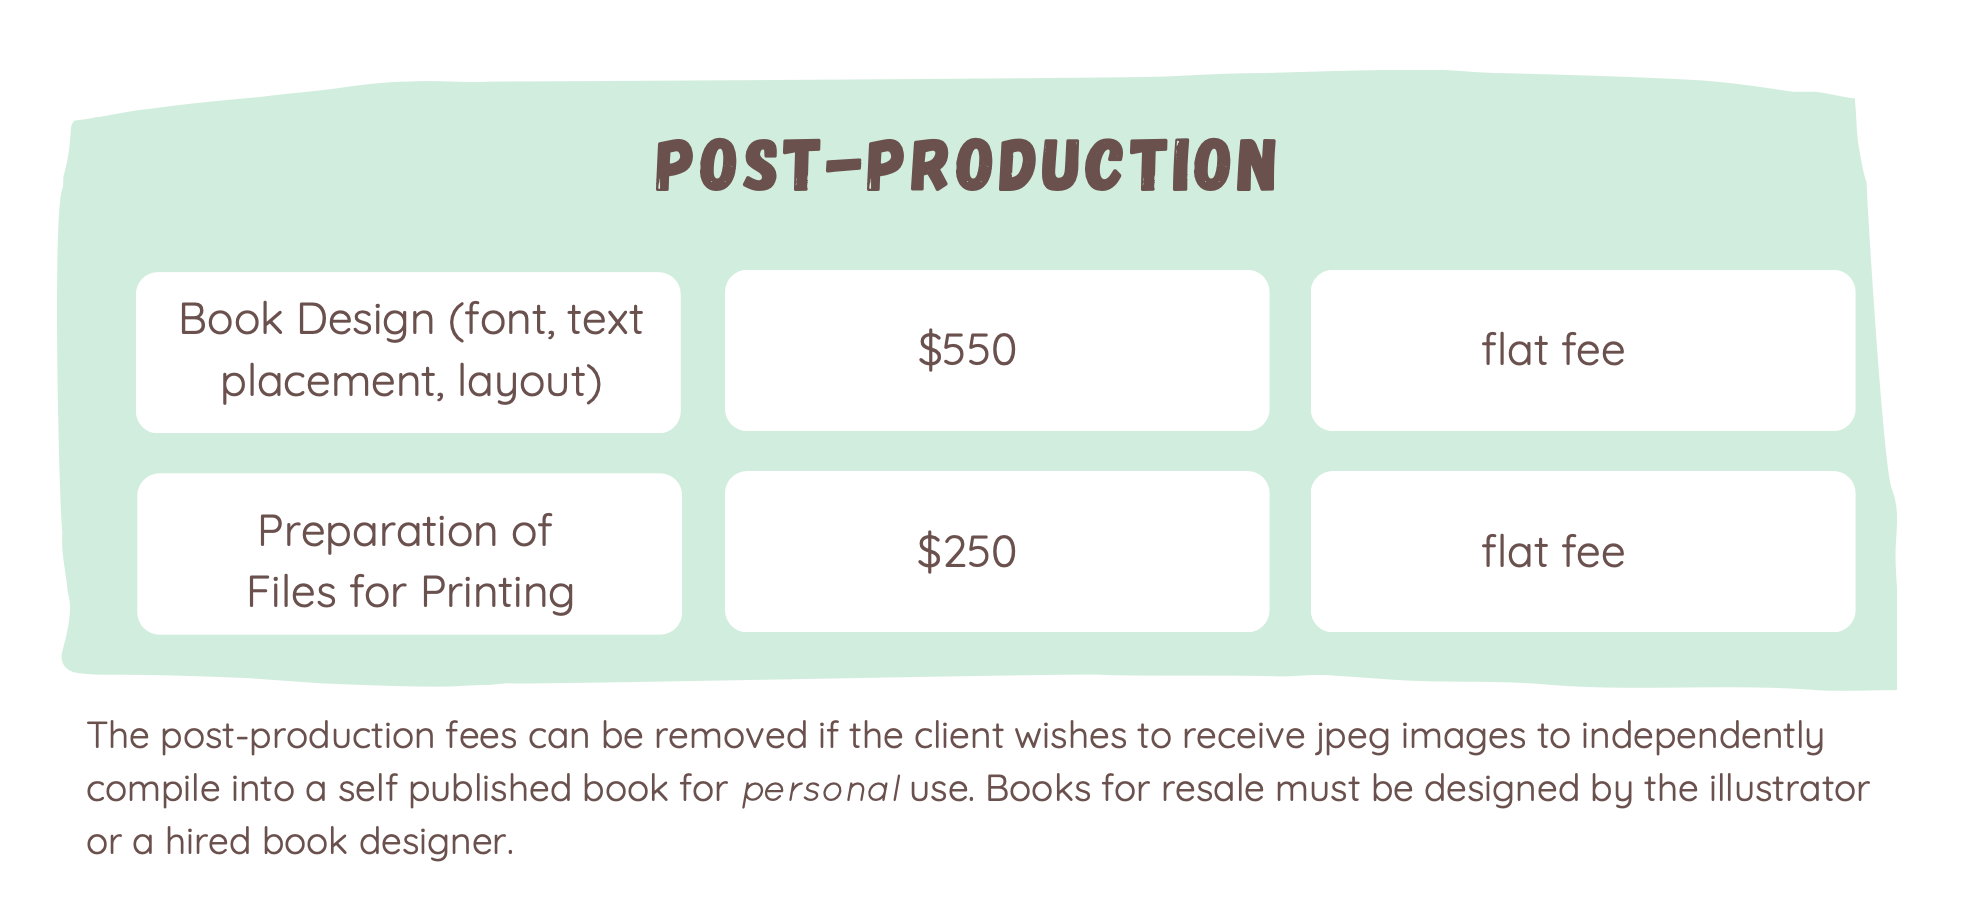
Also, just so you know, In a report from Reedsy, SCBWI reported that “Book Design and Formatting” costs $500 in a picture book project, so this amount could be added to a quote to a client, and then specifically set aside as a budget for hiring a designer.
And lastly, remember to charge for book design!
Here’s the table I include in my Picture Book Pricing Guide about book design and production. It takes a lot of work to be the designer and illustrator, so it makes sense to add an additional fee for it!
Self-published books are big projects, but with thoughtful planning, like the steps above, you can really enjoy the process and have a wonderful book at the end that you will be proud to put out in to the world!
Curious about other self-publishing topics? Revisit the links at the top of this post.
For those of you who have worked on self-published books, what other recommendations do you have about the book design process?
And book designers - what do you think is missing from this list? Any recs from you as the expert?
See you in next week’s post,
Katie
PS - Art Gym is next week, and we’re drawing… DOGS!! Sign up here.
This is such an informative post! Thank you for sharing, Katie😊
Hi, Katie. Very helpful information! When using a template, do you use the same measurements for bleed and gutter sizes? Do they ever change with the type of book or size of book? Thanks!